Homemade Pressure Cooker Yogurt
Homesteading has a lot of benefits. Like the fact that you take the time to learn new skills like making your own yogurt.
Not only that, making your own yogurt will save you money in the long run. I was excited the first time I tried making yogurt about 3 years ago. My first batch was not very successful. (Not to pour a damper on your yogurt parade.)
Yogurt making is kind of an art. You have to try it, re-try it, tweak it a bit. Maybe try a different starter or add a different sweetener. But I promise if you keep at it, you'll have a super delicious batch and everyone in the family will rave about it. Yogurt is now one of the items that is always on my Menu Planner each month.
Now you might ask, is this really cost effective? Yes, it is yummy and you know where all your ingredients came from. But isn't it expensive to make?
First, if you don't know how to cost out a recipe, check out our Free Food Costing Spreadsheet and Menu Planning Kit. I used my own spreadsheet to do the math. 2.5 quarts of yogurt (80 oz) cost me $4.91 to make. One serving of yogurt is 6oz.
After doing the math, that means 6oz or 1 serving of yogurt costs me .38 cents to make. I think that is a pretty decent price for yogurt. Especially knowing where your ingredients came from. PLUS, you get to keep all the whey to use for baking and cooking. (Added benefit for sure.)
This post contains affiliate links to products we recommend. We do make a portion off any you may purchase. See full disclosure here.
Okay, so now, how do you make yogurt? I use this great pressure cooker recipe from Tidbits. I do have a couple things that I do differently, but not a whole lot.
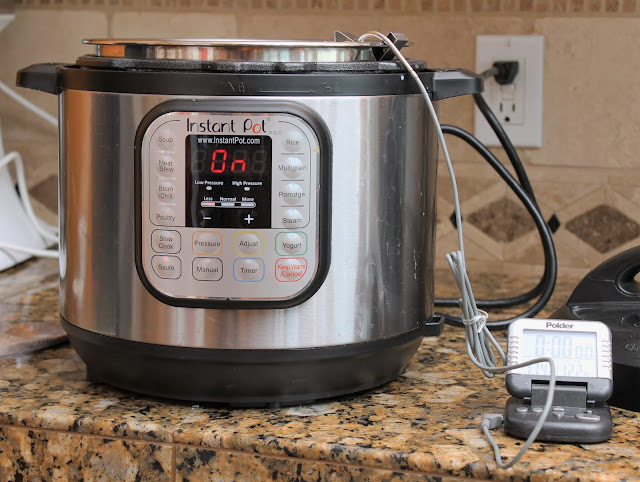
If you don't have a pressure cooker, you can do the same type recipe on the stovetop. But I like having my Instant Pot for many reasons, but I really love using it to make yogurt. (Remember that and Instant Pot and a canning pressure cooker are not the same. They have similar qualities, but I wouldn't use them for all the same purposes.)
One thing I found most important when making your yogurt is temperature. Make sure to follow the temperature guidelines. Most will say to heat the yogurt to 180 degrees F and then cool to 110 degrees F. FOLLOW THIS!! You'll have sour or lumpy or runny yogurt if you don't. Believe me, I've been there.
First, you want to make sure that you use the right type of milk. You don't want to use Ultra Pasteurized milk. You want to start with raw milk or just simple pasteurized milk.
Ultra pasteurized milk has a harder time culturing because your heating it up too much and killing off those good bacteria. Make sure you heat your milk up to 180 degrees and then use a water/ice bath to cool down your milk.
You can just leave it at room temperature and wait, but I like speeding up the process with an ice bath. Get a nice thermometer for your milk. (I have this thermometer. I use it for more then just yogurt as well.)
Once the yogurt has reached 110 degrees F, add your 1/4 c. plain yogurt starter, 1/4 c. sugar and 1-2 Tbsp of pure vanilla extract.
Stir it up and then use the yogurt button on your Instant Pot to culture your yogurt for the next 8 hours. I've done this process overnight or just all day. Either works and the instant pot is on such a low temperature, it doesn't seem to heat up the house.
Stir it up and then use the yogurt button on your Instant Pot to culture your yogurt for the next 8 hours. I've done this process overnight or just all day. Either works and the instant pot is on such a low temperature, it doesn't seem to heat up the house.
After your 8 hours are up, you'll refrigerate your yogurt until it is cool. Usually I make my yogurt all day and let it still in the fridge overnight.
Next, strain your yogurt with either a Nut Milk bag (pictured here) or yogurt strainer. I usually strain for about an hour because I like a nice thick, Greek-like yogurt, but you can do more or less.
Tip: Don't get rid of the whey. That is what drips off of the yogurt. You can use this as buttermilk in loads of different recipes, like out Homemade Buttermilk Pancakes.
Now just bottle it up! You can put it in pint or quart size mason jars. You can put it in little individual 8oz glass jars like these with a little fruit on top for lunches or snacks.
I've even seen people who use the reusable squeeze bags for their little ones and young children. All of these are great options and can be reused over and over for each new batch of yogurt.
Now that you have all this delicious yogurt, what do you do with it? Use it as a topping on pancakes, waffles and toast. Use it as a substitute for sour cream in many of your baking and cooking dishes.
Or just add a little fruit or jam on top and have yourself a delicious and healthy breakfast or snack.
Or just add a little fruit or jam on top and have yourself a delicious and healthy breakfast or snack.


Comments
Post a Comment