How to Prep Jars for Canning & Preserving
One of the best ways to make the most of the harvest season is to preserve your fruits and vegetables using canning jars. Canning is an age-old technique that has been used for centuries to keep food fresh for a longer time. It's a simple process that involves storing food in jars, sealing them, and heating them to kill bacteria.
This post contains affiliate links to products we recommend. We do make a portion off any you may purchase. See full disclosure here.
However, before putting your food in jars, it's important to know how to prep jars for canning. Jars not properly cleaned and sanitized can result in foods going bad and people getting sick.
Selecting the Appropriate Jars for Canning
Make sure that you use mason jars specifically made for canning. Some jars are designed for decorative purposes and may not withstand the heat and pressure required for canning. Look for labels that say the jar is suitable for canning if you are buying new jars.
If you are thrifting or have been given canning jars, make sure to inspect each mason jar for any damage, cracks, nicks or defects. Using damaged jars will result in food not properly heating and sealing and can allow harmful bacteria to grow in foods over time.
Never use commercial food jars for canning. They are not created for proper home canning. Mason jars are made from tempered glass that can withstand home canning temperatures.
Preparing Mason Jars for Canning
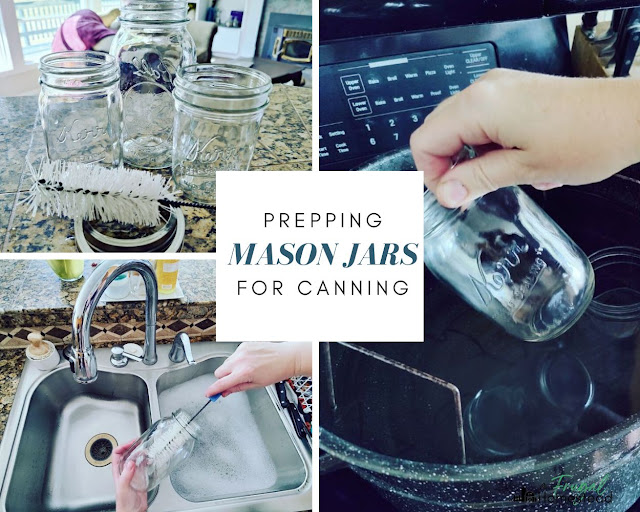
The big question is, how to prep jars for canning? Start by washing mason jars to remove any dust or debris that may have accumulated during storage or shipping. You can use warm soapy water or run them through the dishwasher to clean them.
Next, I recommend boiling your mason jars. Boiling jars in water for at least 10 minutes sterilizes them and removes any dirt, dust, or bacteria that might be present. If you run the jars through a sanitizing cycle on your dishwasher and they are still hot, hot, hot, you can skip the boiling. But boiling is an important step.
Lids and rings should be boiled or sanitized to ensure a tight and safe seal. Boil them for 5-10 minutes or run them through the dishwasher on the sterilization cycle. After boiling, keep them in a hot water bath until ready to use.
I typically have one pot on the stovetop with hot water just for my jars. You can also use your water bath canner for boiling your jars. This way you can get your jars hot enough and after they are clean, filled and sealed, add them right to the water bath canner.
What happens if you don't boil canning jars?
Not boiling your canning jars can lead to foodborne illness and spoilage. Canning jars can contain bacteria and other microorganisms that can grow and multiply rapidly when exposed to warm, moist conditions. Boiling canning jars is a simple way to kill bacteria and ensure that your preserves remain safe to eat for up to a year or more.
Be safe and follow the canning guidelines. There are lots of horrible stories out there of people getting sick because they didn't follow correct canning guidelines.
Ready For Canning
Once your jars are clean and sanitized you can start canning.
Make sure to grab a copy of the Ball Book of Canning. This a great guide on how to can, temperatures need and recipes you can try out.
There are two methods for packing foods into jars - hot pack and raw pack. Which basically means either the food is pre-cooked or it is raw. The method you use for this will depend on the food being packed.
After the food is placed in jars, make sure you have 1/2" to 1" headspace. You'll remove air bubbles using a non metal spatula. Clean the rims of the jars and add the lid and band.
The processing time for canning depends on the recipe and the type of food you are canning. Whether you water bath can or pressure can, the boiling water helps to create a vacuum seal by forcing the air out of the jar.
Once the jars are finished processing, you'll keep them on a towel on your countertop for 24 hours to allow them to cool and seal completely before labeling them and adding them to your food storage shelves.
Canning is a great way to preserve food and build up your families food storage. That is why it is so important to learn how to prep jars for canning properly to ensure the safety and freshness of your foods. By following these simple steps, you can enjoy the taste of summer's bounty all year round!


.jpg)
.jpg)
.jpg)
.png)
.jpg)
.jpg)
.jpg)


Comments
Post a Comment